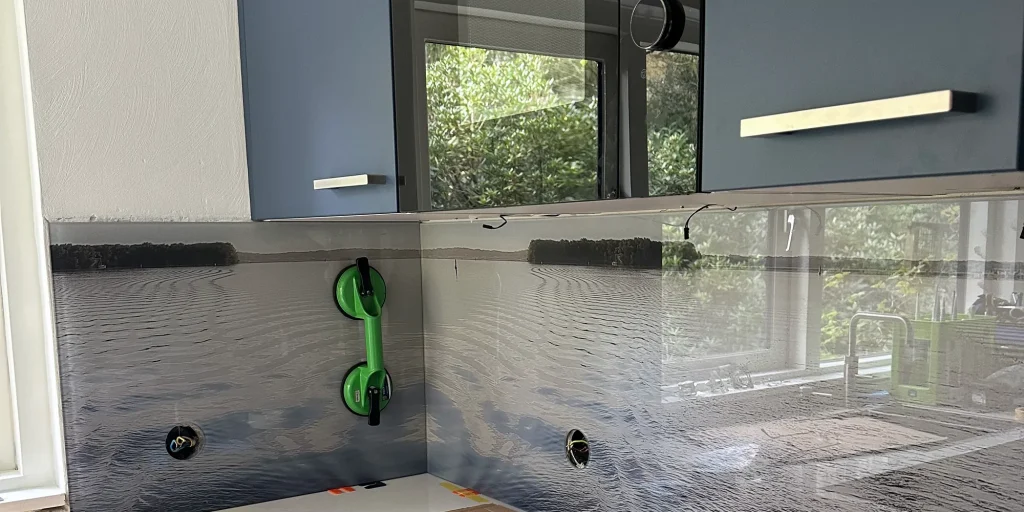
You can install a Designerwand kitchen backsplash yourself, and in most cases straight over your existing tiles. No demolition, no plastering. With construction adhesive, a caulking gun and a saw for the sockets, you are well on your way. Below you will find what you need, how it differs per material and how to install your backsplash in six steps.
What you need
- Construction adhesive, for example Pattex Powerfix Polymer white or a similar product, plus a caulking gun.
- Silicone or sanitary sealant in a colour that matches your worktop or your backsplash, for the edges.
- Tape measure, pencil and spirit level.
- Masking tape, to mark out cut-outs and get a clean sealant line.
- Degreaser or all-purpose cleaner and a cloth, for a clean wall.
- A saw for the cut-outs: a Dremel, jigsaw or hole saw. Only needed if you make cut-outs yourself, and not for glass.
- A screwdriver, to remove the cover plates of your sockets.
The difference per material
Installation works the same way for all three materials: construction adhesive against the wall. The difference is in what you can still adjust yourself.
| DW Original | DW Solid | DW Glass | |
|---|---|---|---|
| Material | Aluminium composite, 3 mm | Solid aluminium, 1.5 mm | Tempered glass, 6 mm |
| Attaching | Construction adhesive | Construction adhesive | Construction adhesive |
| Make cut-outs yourself | Yes, the easiest | Yes | No, specify in advance |
| Cut-outs by us | Possible | Possible | Always |
If you choose DW Glass, include all cut-outs for sockets and taps when you order. Tempered glass cannot be sawn or drilled afterwards. How to measure those positions is explained in measuring your kitchen backsplash.
How to install a kitchen backsplash in 6 steps
1. Unpacking
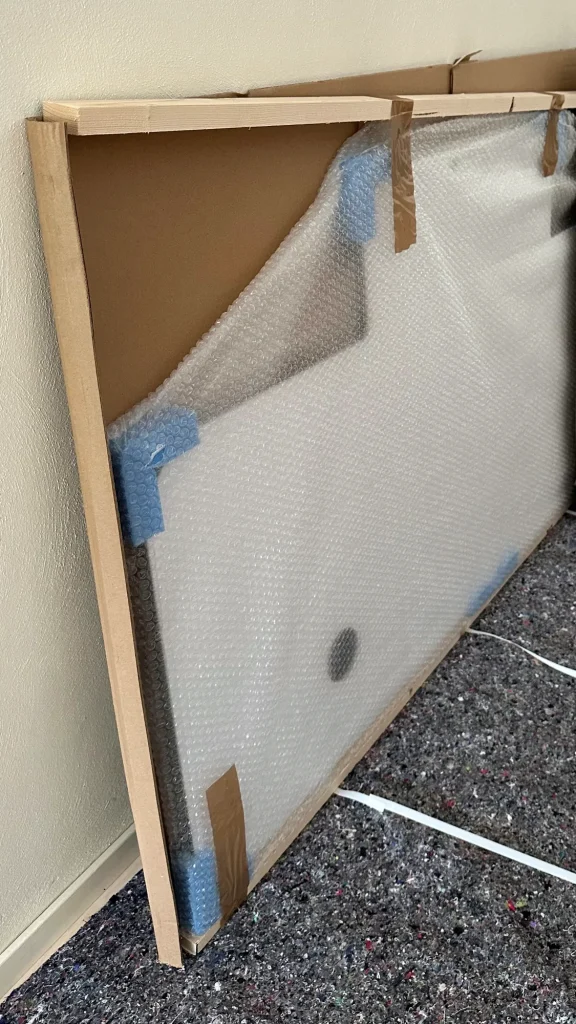
Do not open the packaging with a knife or another sharp object, as it is easy to damage the panel that way. Check the panel once it is out of the box. If you do spot damage, contact us as soon as possible and do not install it yet. If there is a plastic protective film on the back, remove it.
2. Preparing the wall
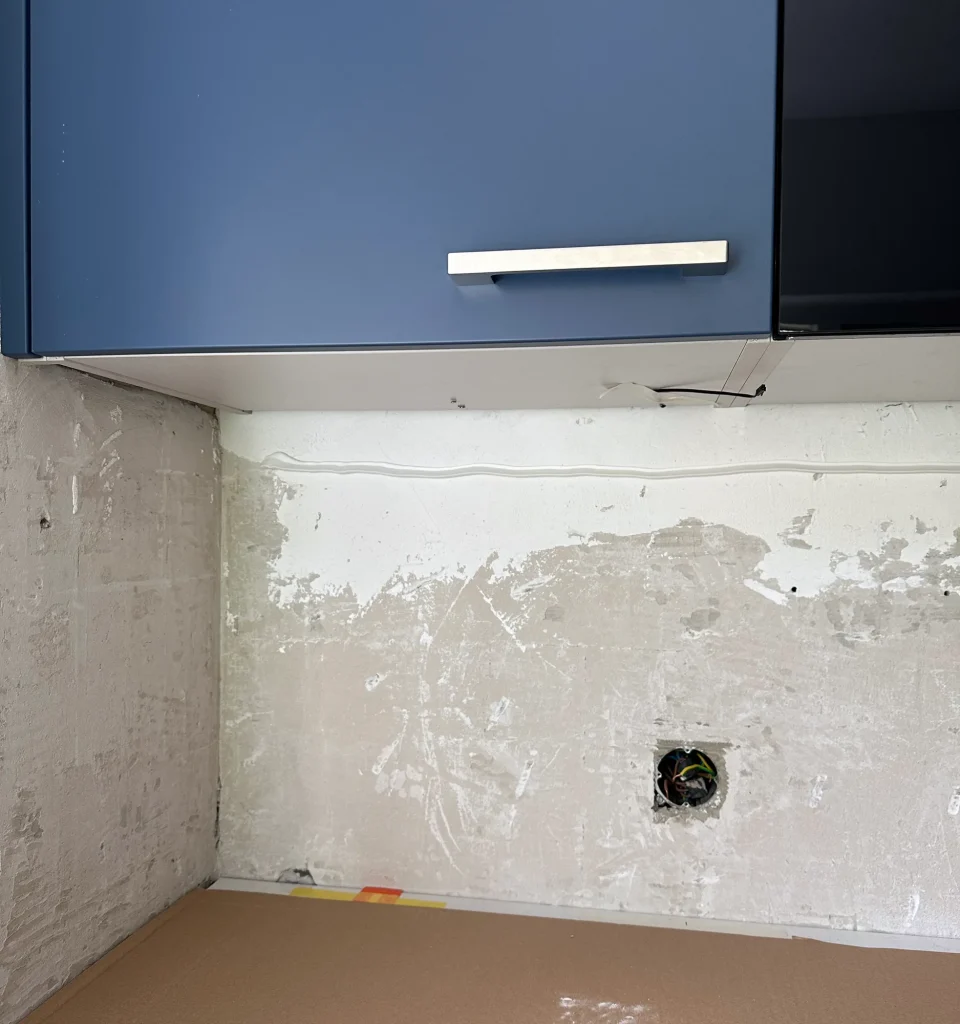
The backsplash can go directly onto the existing wall or over your old tiles. The wall does not need to be plastered, and a little unevenness is no problem. Do remove large protruding bits, such as thick adhesive residue or broken tiles that stayed in place, so the panel does not rest on a bump anywhere.
Then clean and degrease the wall. Especially above a cooker there is often a thin layer of grease on the tiles, and adhesive does not bond well to it. Let the wall dry properly before you continue.
Finally, switch off the power to the sockets on the wall and unscrew the cover plates.
3. Dry fitting and marking out
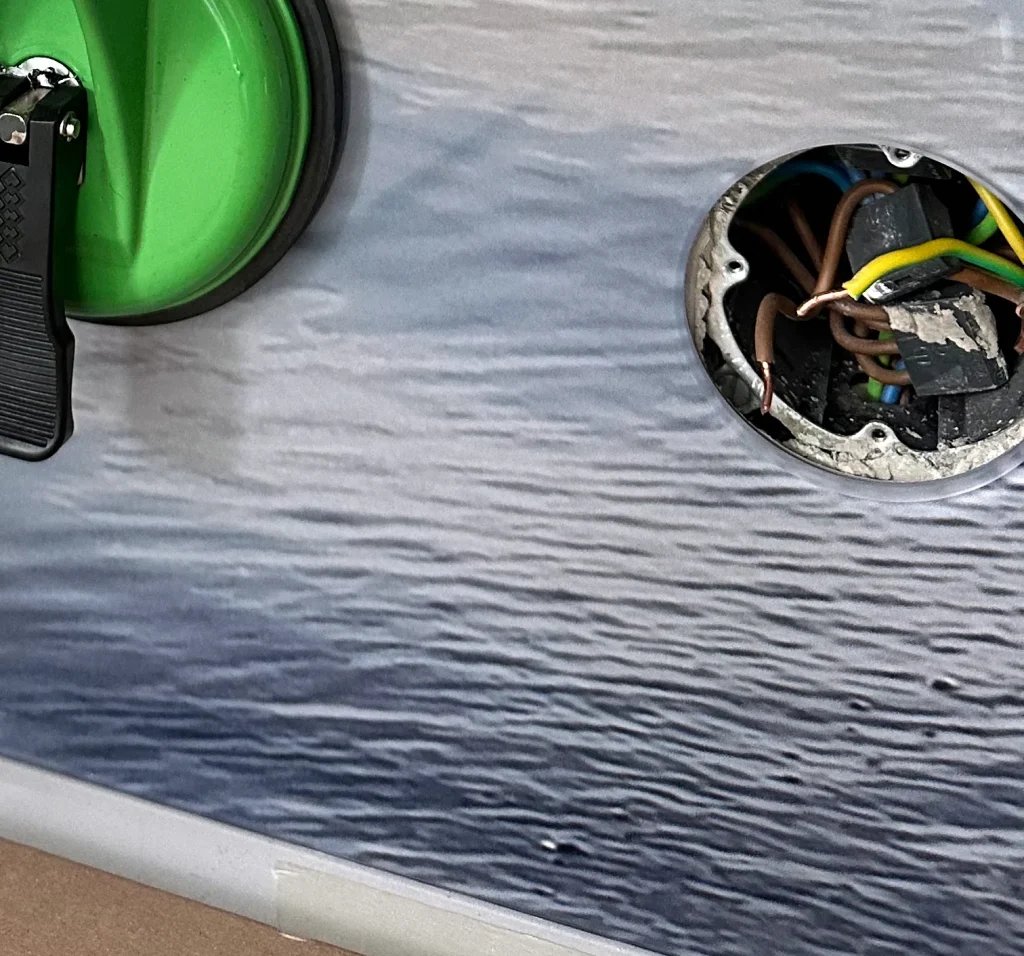
First place the panel against the wall dry, without adhesive. That way you can see whether it fits well against the worktop and in the corners, and you can mark the position of sockets and other cut-outs. Put masking tape on the panel where a cut-out will go, so marking is easier and your lines are easier to see.
Always measure the position of a socket from two fixed points, for example the left corner and the worktop, and transfer that to the panel. Check it once more before you start sawing.
4. Making the cut-outs
If you have DW Original or DW Solid and did not have us make the cut-outs, you saw them yourself now. You can use a Dremel, a jigsaw or a hole saw. DW Original is the easiest: the material is relatively soft and pleasant to work with. DW Solid is possible too, but takes a little more patience.
Practise on a sample first. A 20 by 20 cm sample is ideal for this. After a few cuts you know how the material behaves, and you want to know that before you start on the big panel.
A socket cut-out does not have to be accurate to the millimetre. The cover plate will overlap the cut edge, so a cut-out that is slightly larger than the back box will not show.
Rather not saw yourself? Then we make the cut-outs for you, or we drill small holes where the sockets go, so you only need to saw them out to the size you need. You enter the positions when you design your backsplash.
5. Applying adhesive and attaching the backsplash to the wall
Lay the panel with the back facing up on a clean surface. Apply a dot of construction adhesive every 5 cm, spread over the whole panel, so the backsplash is firmly attached everywhere. Stay a few centimetres away from the edge, so no adhesive squeezes out from under the panel when you press it on.
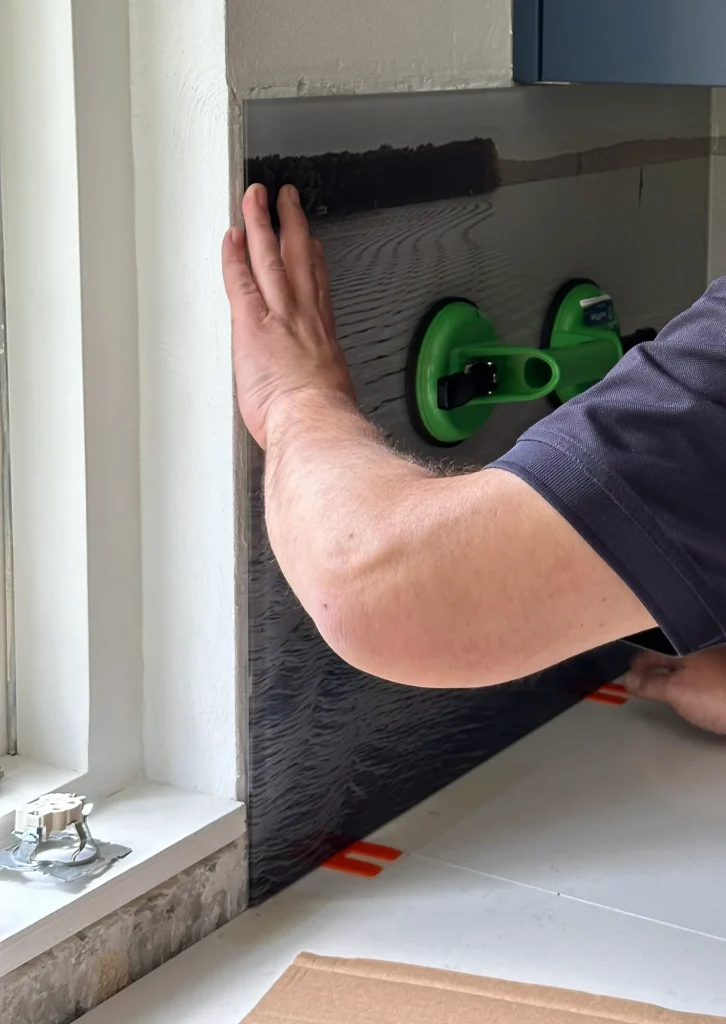
Put the panel in place, check with the spirit level that it is straight and press it firmly over the entire surface. Then let the adhesive cure as stated on the packaging before you continue.
6. Sealing and finishing
Finish the edges with silicone sealant, along the worktop, in the corners and where the panel meets a cabinet or the wall. Choose a colour that matches your worktop or your backsplash, that gives the best result. Put masking tape on both sides of the joint, smooth the sealant and pull the tape off while the sealant is still wet. That gives you a clean line.
Prefer a profile to a sealant edge? All the ways to finish the edges, from sealant to an aluminium corner profile, are in finishing your kitchen backsplash.
Finally, screw the socket cover plates back on and switch the power back on.
Over existing tiles
This is what most customers choose: the old tiles simply stay and the backsplash goes over them. No demolition, no dust and no tiler. The grout lines do not matter, as long as the tiles are firmly attached and nothing sticks out far. If there is a loose tile, glue it back first or remove it.
Do bear in mind that the wall comes forward by a few millimetres. At sockets the cover plate takes care of that; if there is a window frame or a cabinet right next to it, measure whether the connection still looks good. Looking for a design that brings back the tile feel without the grout lines? Then take a look at the tile look kitchen backsplashes.
Glue or screws?
For a backsplash covering the whole wall, we always recommend construction adhesive. In the kitchen and the bathroom that is the logical choice: the panel is attached over its entire surface, there are no holes in your tiles and there are no gaps for moisture to get behind.
If it is a small splashback, for example only behind the tap, screwing it on is a nice option too. With stainless steel standoffs the panel sits a little away from the wall, which looks deliberate and sleek. Want that with DW Glass? Then give us the hole positions in advance, just like the cut-outs.
Rather have it installed?
Installing it yourself is a simple job, but not everyone has the time or the inclination. In that case there are three routes:
- Ask us for a quote. On the request a quote page you can ask about installation. Give us your postcode and we will tell you whether we install in your area and what it costs.
- Post the job on a local handyman platform.
- Ask a trusted handyman in your area. Send them this page, so it is immediately clear what needs to be done.
Common mistakes
- Adhesive on a greasy wall. Above the cooker there is almost always a layer of grease. Degrease first, or the adhesive will let go.
- Too little adhesive. A few big blobs in the middle will not hold the panel everywhere. Spread small dots over the whole panel.
- Adhesive right up to the edge. It will squeeze out when you press the panel on, and it is hard to clean off.
- Sawing straight into the big panel. Practise on a sample first.
- Forgetting the cut-outs in glass. With DW Glass nothing can be changed afterwards. Check your measurements before you order.
- A sealant colour that clashes. A white sealant line against a black worktop draws all the attention. Choose a colour that matches the worktop or the backsplash.
Frequently asked questions
Can a kitchen backsplash go over existing tiles?
Yes. The tiles do not need to come off, as long as they are firmly attached and nothing large sticks out. You glue the backsplash directly onto the tiles with construction adhesive.
Does the wall need plastering before I install the backsplash?
No. A wall with adhesive residue or some unevenness is no problem. Only remove large protrusions first, so the panel lies flat.
Can I attach the backsplash with double-sided tape?
For a backsplash in the kitchen or bathroom we recommend construction adhesive. It holds over the entire surface and can handle heat and moisture. Double-sided tape is meant for light wall decoration.
Can I cut out sockets myself?
With DW Original and DW Solid you can, using a Dremel, jigsaw or hole saw. DW Original is the easiest to work with. With DW Glass it is not possible: you specify the cut-outs in advance and we make them.
Can the backsplash go behind a gas hob?
Yes, but the material matters. DW Solid and DW Glass can go directly next to gas. We only recommend DW Original if there is at least 10 cm between the flame and the wall. Read more in combining a backsplash with a gas hob.
Can I also install the backsplash in the bathroom?
Yes, in the same way: with construction adhesive on the wall, and the edges sealed with sanitary sealant so no water can get behind it. For a freestanding partition in the bathroom we have a separate article on building a partition wall without drilling.
Get started
Do not have a backsplash yet? First measure your wall with our measuring guide and then choose a design from the made-to-measure kitchen backsplashes, or design your own. Unsure about the material? The compare materials page puts the three side by side.
Run into something during installation? Check the frequently asked questions or send us a message via the chat. We are happy to help.
Choose your material, we make it to size
With DW Original and DW Solid you can make the cut-outs yourself or have us do them. With DW Glass we make them in advance, so pass them on with your order.